Sometimes, you may need to adjust how many months of email are available in Outlook, for example, to view older emails that are not currently synced. This guide is specifically for users on Microsoft 365 using the Outlook app on Windows.
Step 1 - Open the Outlook App
Launch the Outlook app on your Windows computer and ensure you are signed in to your Microsoft 365 account.
Step 2 - Go to Account Settings
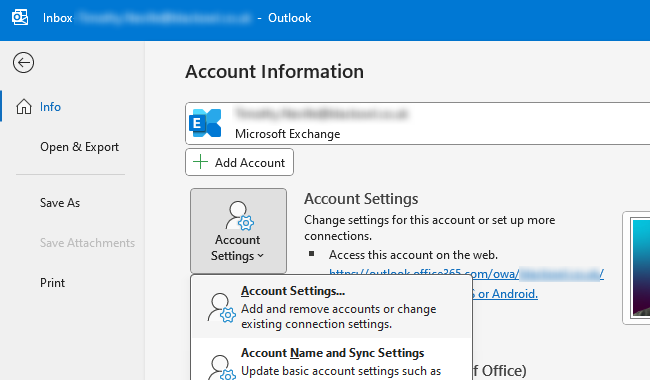
- Click File in the top-left corner of the Outlook window.
- In the Account Information screen, click on Account Settings, then select Account Settings... from the drop-down menu.

Step 3 - Select Your Email Account
- In the Account Settings window, locate the email account you want to adjust in the list.
- Click to highlight the account, then select Change... in the toolbar above.

Step 4 - Adjust the Email Sync Settings
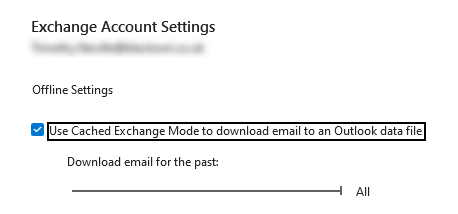
- In the Change Account window, locate the Mail to keep offline slider.
- Drag the slider to increase the number of months of email you wish to sync. For example, you can choose 3, 6, 12 months, or even All if you want all emails to be available offline.

Step 5 - Save and Close
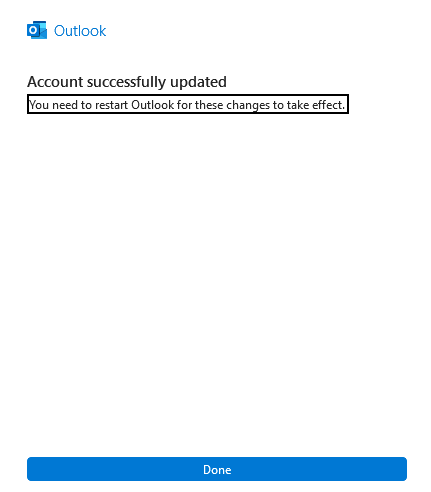
- Once you've made your selection, click Next, then Finish to save the changes.
- Restart the Outlook app to apply the updated settings.

Notes
- The sync duration determines how much email data is stored on your device and may affect disk space usage on your laptop/PC.
- Emails outside the selected period will still be available on the server and can be accessed via the Outlook web app (via office.com).
Last updated: 8 December 2024