There was a problem loading the comments.

Adding a Shared Calendar in Outlook (Classic)

Support Portal  »  Knowledgebase  »  Viewing Article

  Print

To set up a shared calendar on Outlook (Classic) please follow the below steps.


  1. Navigate to the Calendar section of Outlook
    26e03a1618b1f2427376454bbc6dcbd7448be9150537e929ee175e2a5f19d79a77150ab85df27eec?t=c6cc41aa19a378e651ccbe7cb101216b

  2. Click on 'Add Calendar' on the top ribbon bar.
    b6150812c264bfb02495a355c0b07038da440fb20f8deb58c8b6810bb076a722790e4a661707eebd?t=dd87d9bd3c3eb92cfc013e294853ba6f

  3. Choose 'From Address Book' on the dropdown options.
    597c20ccd7bf0ba5c7bbd6f4c24b3b03bdd7dba450e49e3f9047530f515018bb1774dd5a3b69bd65?t=bbe54e992d1f7f7817582fa61bc5cb98

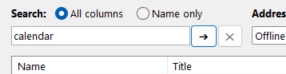
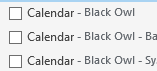
  4. In the window search for the "email address" of the shared calendar. If you are not sure what this is, please check with a colleague or raise a support ticket for further details.
    50b5d172fb7b0dfebfa72968eb11691aab43247412c4b78fed0f2efb120c88ed2b4149dff43299e1?t=45c161e9c705961e0efb67a7bacbc48f

  5. To confirm the calendar, click 'OK' on the window.
    29975073f0af94eb68be7655836d5ba950a96d30b57057d82d05fa29d9a10ba5dcce485b3a3cf3c4?t=961d2d3eca33daf2e8b6359223512f2e

  6. You will now see your new calendar in the left side bar. This can be toggled on/off to suit your preference.
    59cc9bcc700dce7f0f234752ec2cb97a7bbf7998c1f4f339a0b3424a596e814abee57d146ee102d1?t=b9cf2edfb962c0901d8cc6e8e246823d


Last updated: January 2026


Share via
Did you find this article useful?  

Related Articles

© Black Owl Education